
1. Decide that you want a greenhouse.
You can grow crops earlier, later and bigger. You can get cheered up in the winter. See my post Why I cannot get enough of winter gardening. You can feel like a boss because you built a freaking greenhouse.
Winter is long and cold here in Massachusetts and I decided in September (a bit late in the game, ah well) to add more protected growing space on the farm by building two sweet new high tunnels (referred to as greenhouses or houses here): 10 ft tall by 14 feet wide by 20 feet long. With crank roll-up sides for extra ventilation! Woot!
Although I built most of the houses on my own, I got some very crucial help from friends and family and want to make sure they know how much I value that- thanks to my mom, dad, husband, and dear friends Delphine, Fred and Melanie.

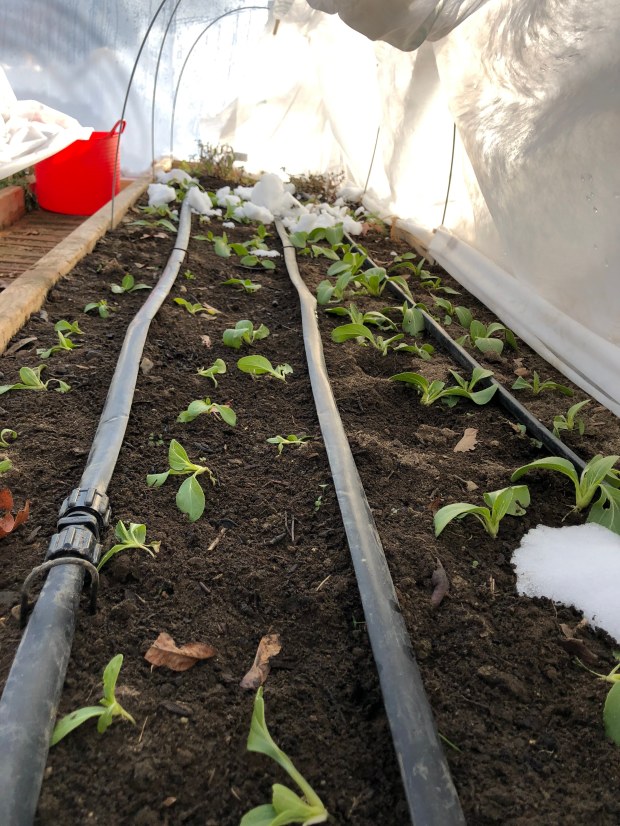
A corner inside of the house January, 2018
This has been such an amazing year of firsts at the farm, and this project did not disappoint in the learning curve arena. oh no, it did not.
I built a much smaller high tunnel last year -6 feet tall (in the middle), 13 feet wide, 16 feet long-using a hoop bender from Johnny’s selected seeds and a plan designed by one of my farming heroes, Eliot Coleman. I learned a ton from that project too.
Here are some pics from the first tunnel- Winter and Summer of 2017


")
")
")
2. Decide where you can/should place the greenhouse.
It really makes the most sense to place a greenhouse where you are already growing, but you could also find a new sunny spot if that isn’t possible. It is important to know where your winter sun is. There is only one place in my growing area that gets enough winter sun for large houses- so that is where I built them, even though I would have much preferred them elsewhere. Watch where the snow first melts this winter. Take note of where the sun hits midday in December, January and February. Consider your access as well, are you siting the house in a location you can get to each day in mid-February to vent it? Will you be able to get water to your plants?
Measure your space, mark the corners. Go all in, if you are going to bother building a structure, you might as well build the largest one that you have space for and will use. Personally, I could use 10 more. But alas, There isn’t enough space. Having said that, you still have to plan on walking paths on all sides of the house. You want space to maneuver around/through the house in the summer and will need room for snow in the winter. Remember that all of the snow that would have fallen in the area where your house sits will now fall off to the sides. If you are building multiple houses side by side Leave at least 6 feet in between them. Note: I definitely broke this rule. Sometimes it is okay.
3. Choose your optimal greenhouse design, read your plans and purchase supplies before you begin building.
After researching different greenhouse options (buying something used, putting together a kit, hiring someone else etc.) I decided was best if I just built it myself. I went with the Gothic High Tunnel plan from Johnny’s Selected Seeds. I like this design in particular because it has a peak at the top to more efficiently shed snow in the winter. The height of 10 feet will allow me to trellis tomatoes and cucumbers in the summer, and also allows for much more walking space near the walls.
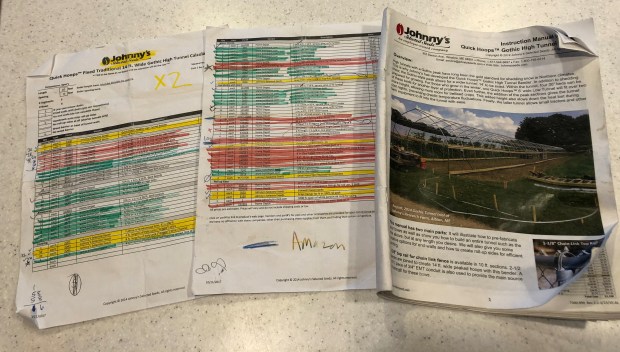 I know I sound like a sales rep from Johnny’s here, but they have some uber-helpful instructions, planning worksheets and videos to help both beginning and advanced growers on their site. I ordered Johnny’s Gothic High Hoop Bender, which also came with 40-page illustrated instruction packet to build the greenhouse. There is a suggested parts spreadsheet (which changes according to what you enter as your greenhouse dimensions) and I purchased most, but not all, of what was suggested. For example, I bought untreated pine instead of treated decking for the hip and baseboards. No chemicals for me, but things will certainly rot faster.
Guess what? There is actually an online store for parachute cords. No joke, it is called Parachute-cord.com. And yes, I ordered some parachute cord from them. It helps keep the roll up sides in place and is an amazing material. I have to figure out how to use the excess in some sort of amazing MacGyver way. I also ordered parts from Boltdepot.com (great prices!), Chainlinkfittings.com, Johnny’s Selected Seeds, Home Depot, Acton’s Ace Hardware (great advice there), and Amazon to get everything I needed. Of course, there were countless trips back to the store to exchange, return and get more of stuff. Like drill bits. I went through many bits. Many bits of metal make for many bits. Did that work? Hmm…
4. Prepare your soon-to-be covered growing area. Optional.
You can choose to take care of your planting area before or after you build your house. For me, it made more sense to do it before because I was constructing raised beds.
So, even though I started measuring and planning in early September, I didn’t actually begin on the greenhouse construction until the very end of October and finished December 9, a few days before the first snow. Why did it take so long you ask? Well, I was still working on harvesting the summer crops, running my first CSA and still working on soil improvement and new beds. I hope to finish all bed construction this year…. And talking to the chickens. It takes more time than you think to make sure chickens are feeling understood.
AND THEN, I realized that I couldn’t exactly just get started building because I had to rearrange raised beds first. I grow on a slope, and need to terrace beds down the slope, the beds in the greenhouses are no exception. Learning from last year’s mistakes of building beds after the hoophouse, (lots of damage to plastic walls, difficulty maneuvering soil and tools in/out etc.), I decided to build the beds I would need inside the house before building the house.
This meant dismantling 6 larger beds lined with bricks and stones to 12 24/30″ wide beds built with untreated pine. Which meant, of course, taking a hard look at the soil and realizing I should double dig, get rid of subsoil and back fill with the sweet compost I had been making all year (with help from my chickens). And little help from Coast of Maine composted manure (love that stuff).
There are now 4 rows of beds in each house, the 2 middle rows have been broken up into 2 beds each so that you can move around more easily in the house.

These are the beds in house 2- Bricks line the paths in between them. House one has scrap wood from the project lining the paths.
I have to say that this was an incredibly laborious part of the project and I underestimated the amount of time that it would take to do. It was a lot of moving rocks, digging with a pickaxe, moving soil, etc. Not different than what I have been doing for the last couple of years, but I really wanted to get the houses built before the ground froze, so I was more than ready to complete this phase.
Just to get an idea of the ground work: Here are some pictures from prepping beds for ONE of the 2 new houses. Notice the smaller, original hoophouse on the left.


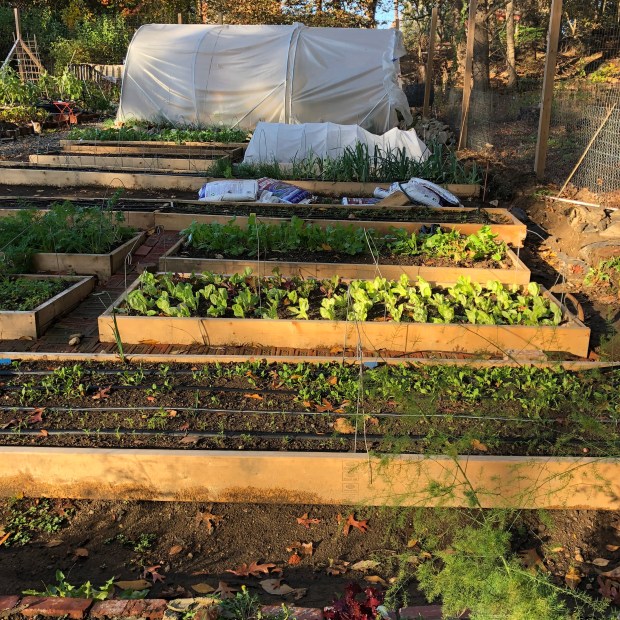
Beds are Done! View from down the hill – 2 14-foot wide greenhouses will soon cover these beds

Panoramic View of the beds (the ones on the right still have the bricks in front of them in this picture, but they were soon moved to the paths between them).
5. Build the Greenhouse Frame: Manipulating metal: Cutting, Drilling and Bending
The main structure of the greenhouse is built from metal pipes- 1/2″ EMT, 1-3/8 fence top rail and 1-5/8 line posts. They come in 8 and 10 foot long pieces, so you have to cut many of them and use the handy-dandy bender to make them curved. And an impact driver to make holes. Not a drill. So. many. holes.
I found that the best way to cut the metal pipes is using a bi-metal blade on a reciprocating saw. You just have to make sure that the pipe is clamped well in place before sawing because the kickback can be a bit, um, dangerous. I also found that between all of the drilling and cutting you definitely want both ear and eye protection.
A. Ground Posts
Ground posts are what anchor the greenhouse to the ground so that a bomb cyclone does not send it flying. I cut 10 foot long 1 5/8″ chain link fence top rail into 4 foot sections to make the posts, then pre-drilled some holes but ended up having to do them all again later, so I am not going to bother describing that part. Sad face. You can choose how much space will be between them (and consequently your bows). I placed the ground posts every 4 feet along the sides.


Using a sledge hammer, a small stool (to get taller than the 4-foot post) and a ground post driver I whacked the posts 2 feet into the ground. I tried hard to get them straight, and should have used a level to actually achieve that. Of course, I did not. So lazy, Kate, so lazy.
In hindsight, I would recommend using a full size, not a baby-sized, sledge hammer for this task. But hey, 24 posts 2 feet into the near frozen ground later, I was all set. Baby sledgehammer and all.
B. Bows
It is pretty fun to bend the pipes. It seems like it will be the hardest thing, but it is actually one of the easiest parts. And did I mention fun? However, it is a bit tricky to make sure all of the pipes have exactly the same curve, mine certainly didn’t.
The instructions that accompany the hoop benders say that you can attach the benders to a picnic table, but that does not work. I tried it. I also have tried attaching them to wooden stairs and a log-bench. My recommendation is to use a wooden workbench with plenty of space around it. I actually built a workbench (with my Dad’s help-thanks Dad!) in order to anchor the bender. It was perfect.
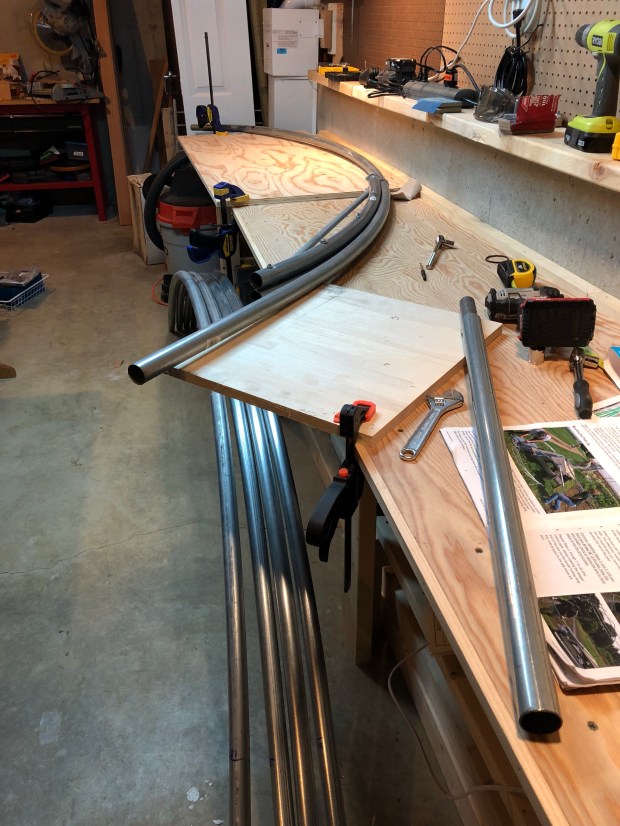
Bender attached to new workbench
Here is a video of me bending a pipe, like I said, pretty fun.
When all of the pieces are bent and cut, you can assemble your bows. It is important to do this in a large flat area–I used the grassy area over the leechfield in my yard. What is great about this part is that you use the thinner, swagged ends of the top rail to fit inside the two ends of the peak piece, and it finally feels like you can see where your work is leading you. You also attach a bunch of other stuff, like brace bands, and bolts and make a bunch more holes. Obviously what ever instructions you decide to use will help you figure all of this out.
Once your have your first bow assembled, find some small wooden stakes to outline it and form a sort of jig on the grass to guide the construction of the rest of the bows.


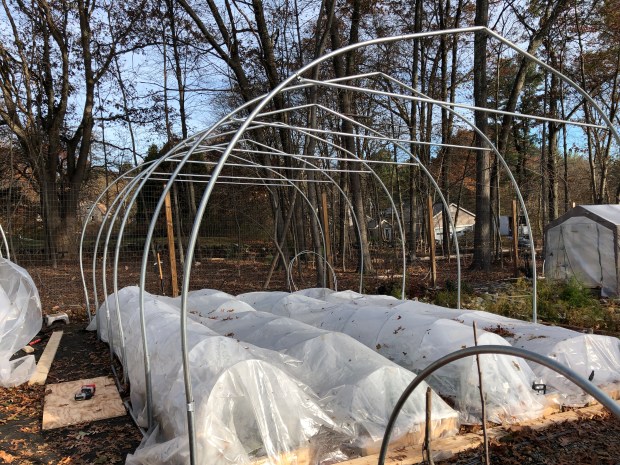
Moving assembled bows to their final destination is definitely a 2 person job (Thanks Delphine!). Each side of the bow fits inside of the groundposts. Sometimes it takes a bit more force to get them wedged in, depending on the overall shape of the bow. If you are using your leg to maneuver the ground post while muscling in the bow with your upper body, try really hard not to get your skin trapped in between the ground post and the bow. It will be painful and you might get a scar. Hypothetically.
Once the bows are in, you will likely need to make some adjustments to get them all lined up, but you will be able to see the shape of your house taking shape! So exciting.
C. Cross Bars
I used the good ole baby sledge to flatten the ends of the 4′ pipes in order to make crossbar supports. The instruction book said that you can use a hammer (I really don’t think a regular hammer would have worked here) or a vise. To test out the vise idea, I brought a piece of pipe to my local Ace Hardware and one of the guys there tested tried to flatten it with a large vise there. Did not work. No dice on the vise. Baby sledge brute force worked fine. Although I did have a massive headache at the end of the day–this was a another part that was harder than it looks. After flattening the pipes, cut off the corners and drill holes. More holes.


D. Ridge Pole.
 Attach 2 10-foot poles to the very top of your house. If you have no fear of heights, this part will go much faster for you than it did for me. I think I must have looked ridiculous working so slowly on the 10-foot ladder, but I got it done, just really really carefully. After realizing I needed a way to hold the ridge pole in place, I placed a notched board and some strong clips to support the pole while I drilled it into place. I would definitely recommend doing this part with 2 people.
If you choose to build your beds (and plant them…) prior to building your house, you are definitely going to have some collateral damage at this point. It seems worth the price to me even through I killed a bunch of plants and compacted soil with the ladder legs as I moved from bow to bow.

Some views from above:


There was a lot of adjusting to do after all of the pieces were in place. I pulled some bows higher out of the ground posts on one side, pushed them deeper on the other, and adjusted the high cross bars until most of the bows looked more or less in line with each other. Most impressively, I successfully roped my lovely husband into helping with some of the final tugging and tightening before adding hip boards and baseboards. Thanks, husband.


6. Attach Hipboards and Baseboards
I used 2x6s for the baseboards and hipboards, but you could definitely use something different. The purpose of the boards is for increased stability as well as to attach plastic and build roll-up sides. The instructions said to place the hipboards at about shoulder height. For me, that is about 4 feet. Obviously the more obvious name for them are shoulder boards.
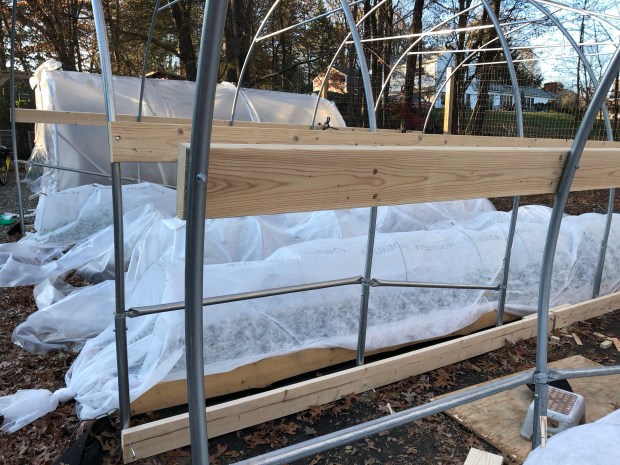
Each hipboard has to be clamped and attached to the bows using carriage bolts. Because I opted for the 2x6s and not decking boards (as the instructions suggested), the carriage bolts I ordered were not quite long enough, so I had to ream out each section of the board prior to attaching. I would simply recommend here to get longer bolts. The baseboards are attached with j-bolts which serve to hold parachute cord later in the process.
The instructions also call for using 16 foot long boards. I really don’t think this is necessary. 10 foot boards would be far easier to purchase, transport, and store. Oh well.Although not pictured here, my buddy Melanie was here for another day of free farm labor.

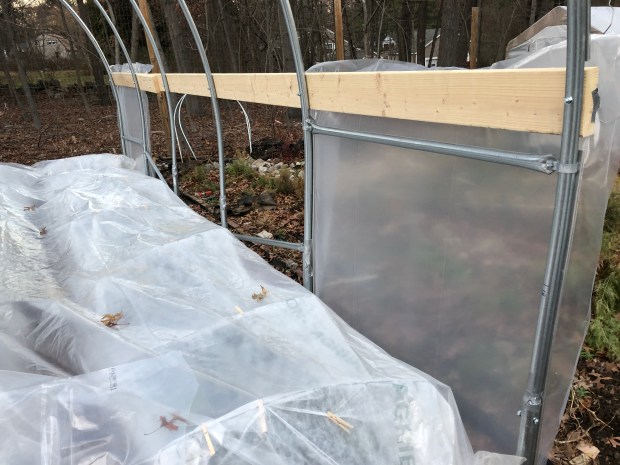
7. Attach the polylatch channels and install first plastic panels.
Poly latch channels and wiggle wire are amazing! How did I not know about this before? This is the only way to build a solid, tight house. I have tried snap clamps, and they simply pale in comparison.
Polylatch channels are pieces of metal meant to house wiggle wire, which holds greenhouse plastic in place.

Polylatch channel attached to hipboard
I used 1/2″ self-drilling screws to attach the channels, (hex are far easier than Phillips heads) and I again had help from my betrothed bending, clamping and attaching the channels to the first and last bows. He is much more comfortable on the ladder than me, so this sped things up quite a bit.

Channels bent and attached over first bow- Many clamps have to be used on the bows because the channel *really* wants to spring back straight.
After all of the channels have been attached, attach the first plastic- below the hipboard and between the first and second bows of the sides. This is to prevent drafts under the looser roll-up side system.

Wiggle wire
It took a few tries to figure out how to both pull the plastic tightly and also snap the wiggle wire into the channels. Eventually I came up with a system using some heavy duty clips to hold it in place, attached it at the bottom first, left to right.

Installing the first panel using clips to pull plastic tight
First panels installed!
After attaching, I used scissors to trim excess plastic off.
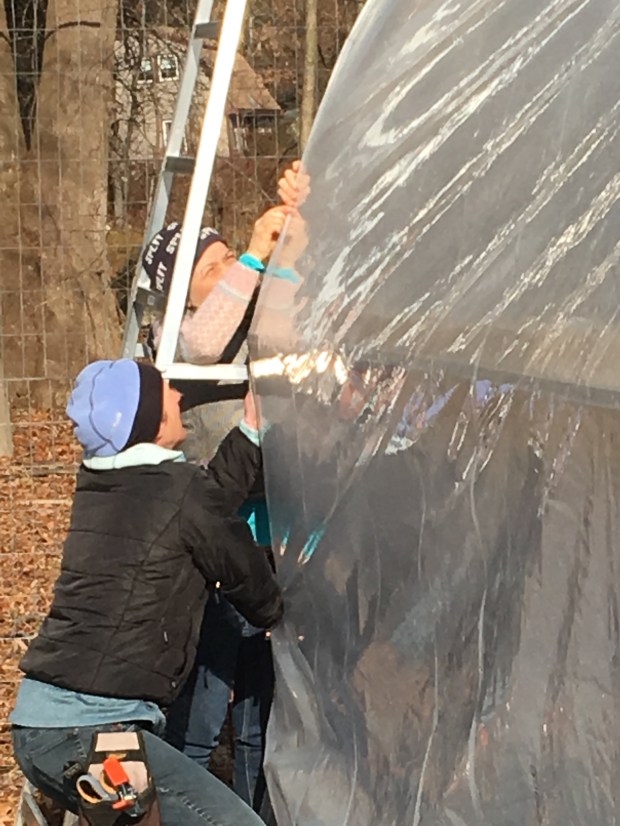
8. Build doors on both ends of your greenhouse.
You can choose to frame and build real doors on your greenhouse or construct the simpler scissor doors. You could even do one of each, which was my original intention. In the end, I decided that I would use all scissor doors. The neatest thing about them is how easy they are, and how they can be easily opened a little or a lot depending on how much the house need to be vented. Scissor door are built from pipes that hang from the ridge pole. Plastic is then attached to the pole (with snap clamps) and also the side/top of the hoophouse (with wiggle wire).

Scissor doors opened to vent house

Pulling plastic to skin a scissor door- a *fun* challenge on a windy day

Attempt to keep doors in place while drilling a hole through pipes and wood in order to anchor doors with bolt.
9. Skin the house on a non-windy day with some of your best friends.
I was so excited when a weekend day arrived with a low wind forecast. Melanie, Fred, Laban and I skinned the house. I love that term, skinning. It means exactly what you think it might- attaching the plastic to the greenhouse skeleton. And it definitely has to be done on a calm day. I thought it would be harder than it was, but the 20 foot house length was short enough to easily allow the four of us to manage the process fairly easily.
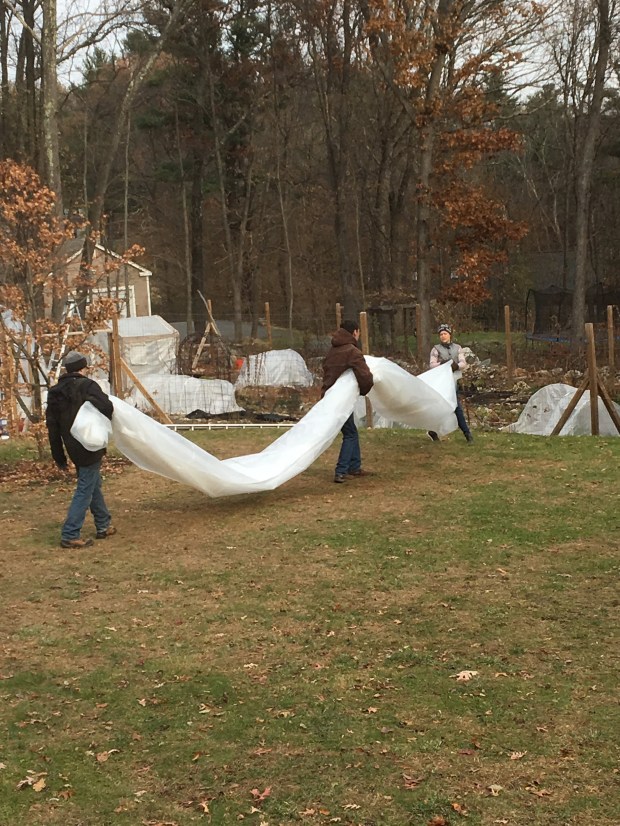
Carrying the plastic for one house (25’x32′ I think)

Notice here that the doors are already skinned tightly.

Don’t forget to walk inside of your newly skinned house! It was late afternoon and getting dark when we finished, but the air inside was already warmer and it was great.
10. Install roll-up sides
The skin over the house is attached tightly to the hipboards and then it hangs down more loosely below the boards, weighted by 3/4″ EMT attached at the ground. This plastic below the hipboards forms the roll-up sides, which can be rolled up to the height of the hipboard.
Do not purchase emt compression fittings from your local hardware store like the instruction book says. I did that and the metal connectors keep breaking apart, and although I keep fixing them with duct tape I will likely need to rebuild the entire bottom of the sides in the Spring. I am going to try this coupling from Bootstrap Farmer instead.
Fitting the emt into the cranks was a bit clunky, but after the 3rd one, I had it down. Definitely get everything in place (the poles to hold the cranks, the cranks, the emt, all across one side) before you start attaching the cranks to the pipes- much easier to adjust pre-attachment.
The last step is to attach the parachute cord on the sides of the house. It’s job is to keep the roll up sides snug against the house. It gets threaded through eyehooks on the hipboard and the j-hooks on the baseboard.
AND THERE IT IS!
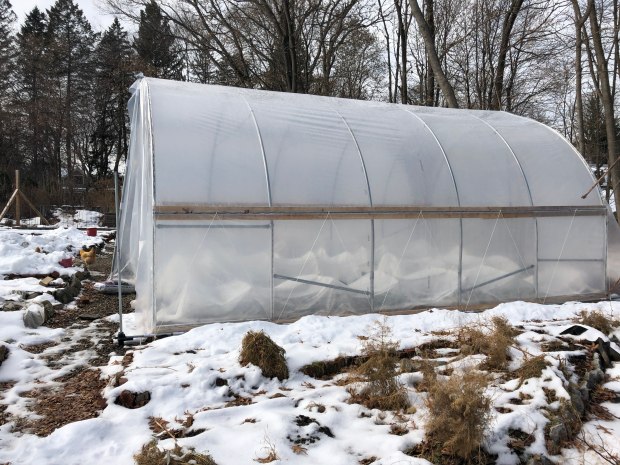
Side view of House 2. 20′ long, 10′ tall and 14′ wide
DONE!
Update:
There has been no melting here for over two weeks. It has been incredibly cold. The soil froze inside of the houses (which did not happen last year). I thought the plants would not fare so well but I happily discovered the opposite a few days ago when I went to “water” them with snow. Not only are most things still visibly alive, but they are beginning to resume growth. Just a bit. Yay! Here is what is the plants look like now (mid-January 2017) after more than 2 weeks of super cold temps (way below freezing):

not dead!

Swiss Chard: not dead
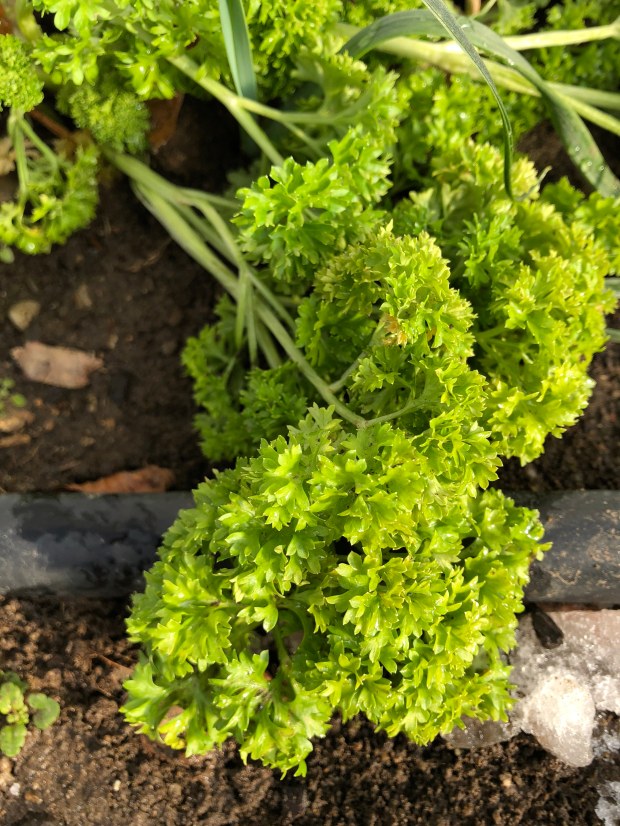
Parsley: not dead
Poc choi: not dead

Cute turnip: not dead

Kale: not dead

Lettuce: not dead
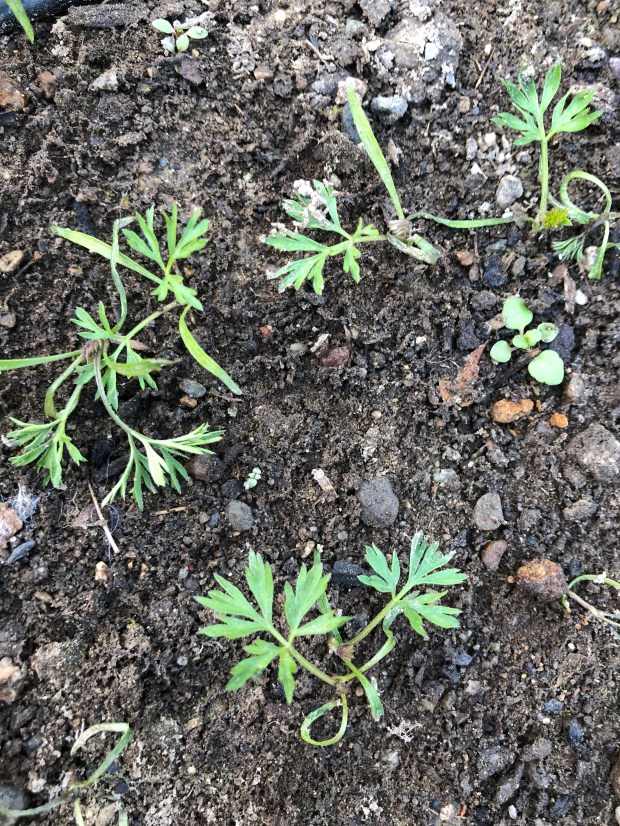
Carrots: not dead


And I want to build a high tunnel in Georgia….
LikeLiked by 2 people
Build it! And good luck!
LikeLiked by 1 person