
Introduction: (Scroll down to numbered list to skip all the verbiage and start building).
Over the next week I will be starting to grow some of my farm plants inside. Eventually most of these seedlings will move outside and to be transplanted into the ground. A few more are destined for pots on the porch, and a few more are destined to be sold at Farmer’s Markets and through my online store. Still setting that up for seedlings–check back in about a week.
Anyhoo, I thought it might be useful to have some sort of a guide if you are interested in doing this yourself. There are many grow stations for sale in gardening supply catalogs, but years ago I was desperate for more choice in my seedlings, so I decided to build my own grow stand. It works great. Now I can select pepper, eggplant and tomato seeds from catalogs and grow them myself (along with a myriad of other plants…)
I have been doing this for about 10 years now and have a few hacks I can share. As always, I am still learning, so throw your ideas and thoughts my way–I am always looking for improvements!
Because starting seeds inside can be a bit tricky. I have decided to explain the steps over the course of 3 posts (the plan is to publish them all this week).
Post 1: Build your own Grow Station
Post 3: Care for your seedlings
(end of wordy intro)
BUILD YOUR OWN GROW STATION
Steps:
- Assemble some shelves, lights and find a heat source if you want to grow heat-loving plants like basil, tomatoes, peppers and eggplants.
- Convince your family members it is a good idea to have dirt in the house. It means things are growing. Literally. Maybe this should be step one, but you know the saying–better to ask forgiveness than permission.
I estimate the cost savings of building my own DIY grow station (as opposed to buying a pre-built commercial one) to be about 70-80%. Granted, it is not as fancy, pretty or as easy to use, but it does the job. In fact, I would venture to say that it works great!
Here are the items you need. AND you can get away with less if you want!!! Here are the supplies I just purchased to build a second grow stand in my basement. All items were bought at Home Depot except for the timer-power outlets. I got those from Amazon.
One of the best parts about my DIY grow stand is that it does not require any tools. If you love tools, that may make you sad, but for those looking for easy–here it is!
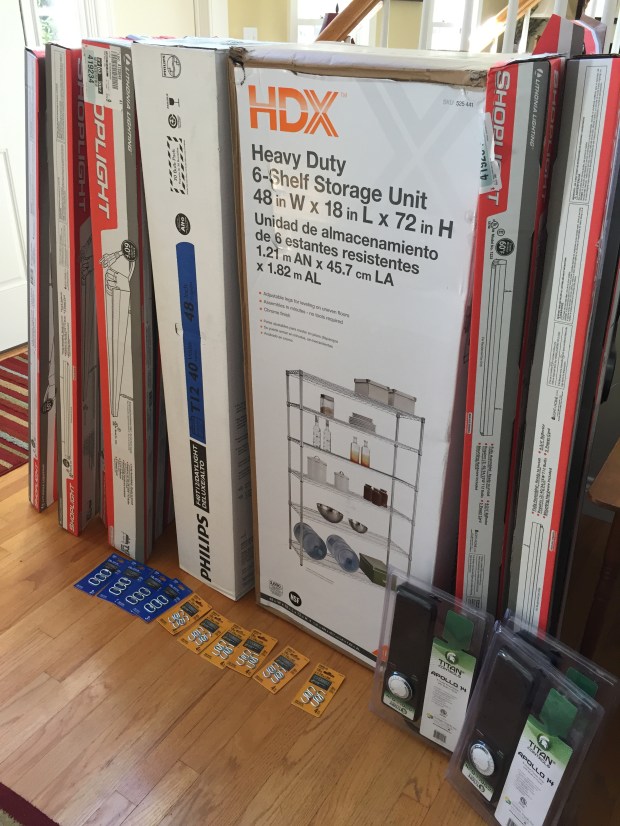
3 timer power strips, 12 shoplights (I hang 3 shoplights from each shelf, each shoplight takes 2 bulbs), 24 s hooks for hanging lights- each light requires 2, one case (30 bulbs) of 40 watt daylight T-12 bulbs, 3 timer-powerstrips to turn lights on/off. and a heat source (not pictured here, more about that later)
The Details: Parts

Haven’t tried these yet- but am hoping they will lower frustration of keeping chain attached to light when adjusting light height.
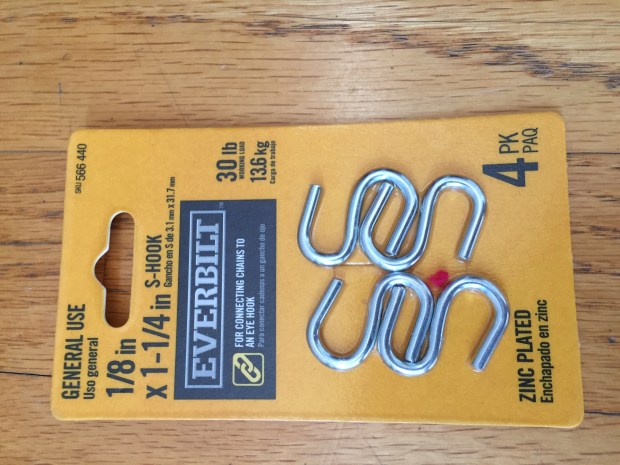
S hooks for hanging the shoplights from the metal shelves
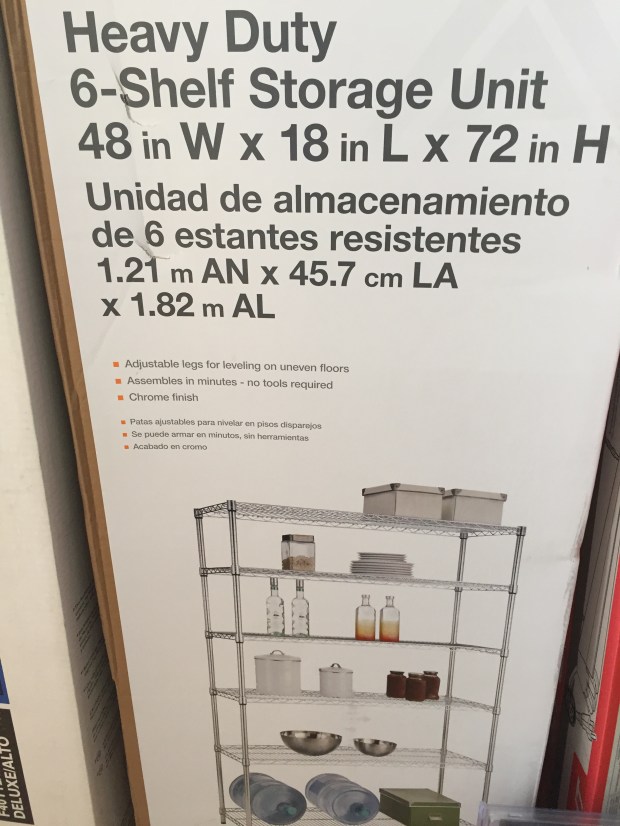
6 foot tall, 18 inches deep, 4 foot wide metal shelving unit in box.
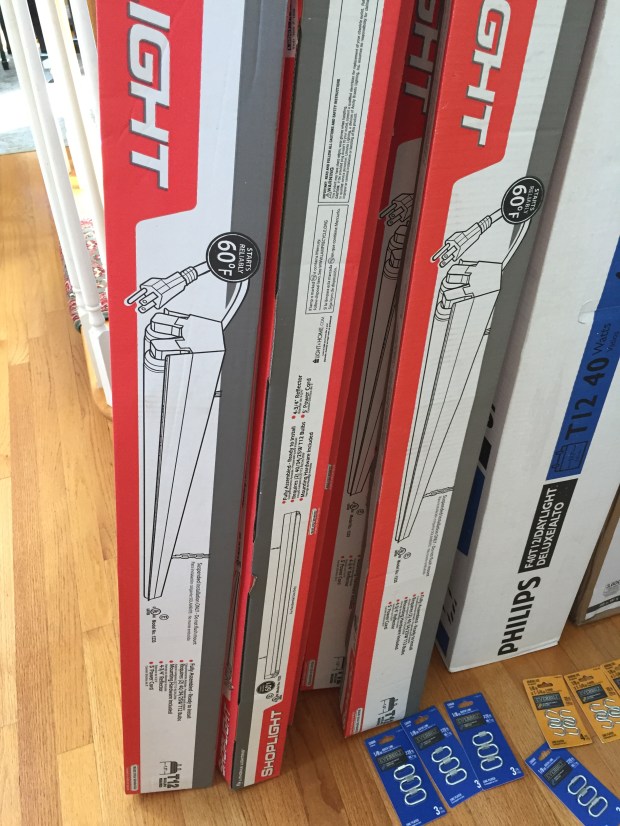
These cheap shop lights have several advantages over some other shop lights- they are not meant to be directly mounted to the ceiling, so they come with chains which allow you to manually adjust the height of the lights as your plants grow taller. Ideally, you want to place the lamps 1-2 inches away from your plants. Secondly, they have no cover, just fixture and bulbs, so all available light goes to plants. Thirdly, they are 4 feet long, which fits the size of the metal shelving perfectly.
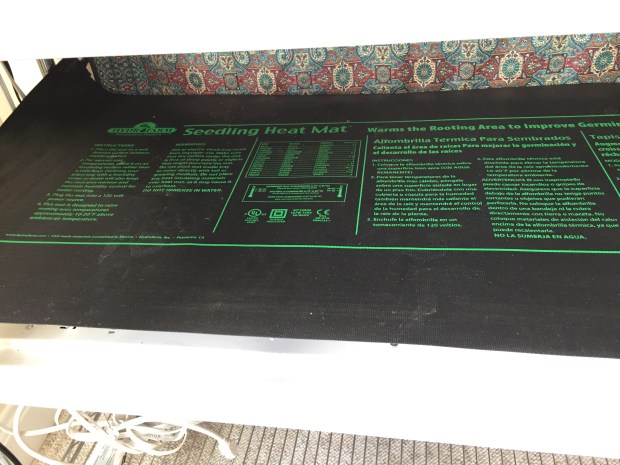
This is a germination/growing heat mat. Not pictured in my recent purchase picture above because I am going to move mine around as needed.
Here is the assembled version:
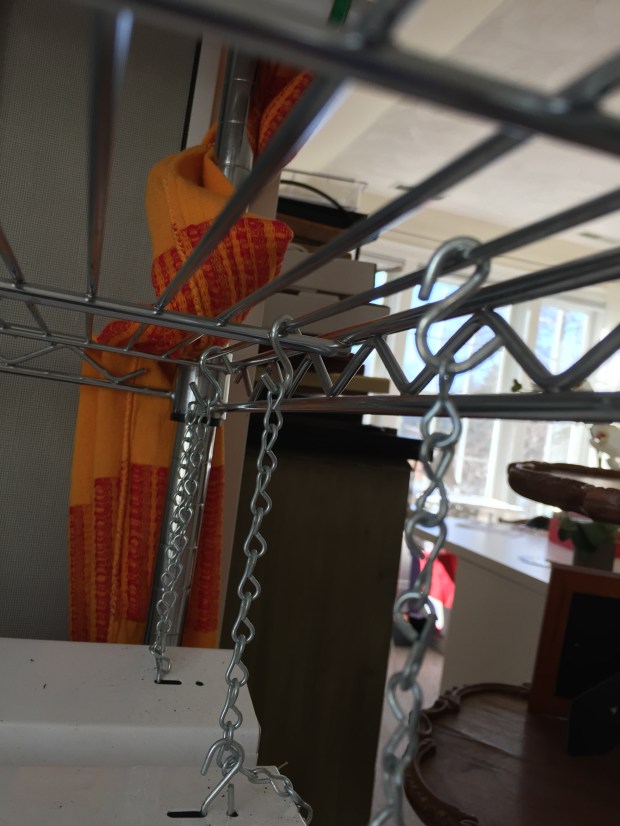
Close up of S-hook holding chain from shop light to the shelf
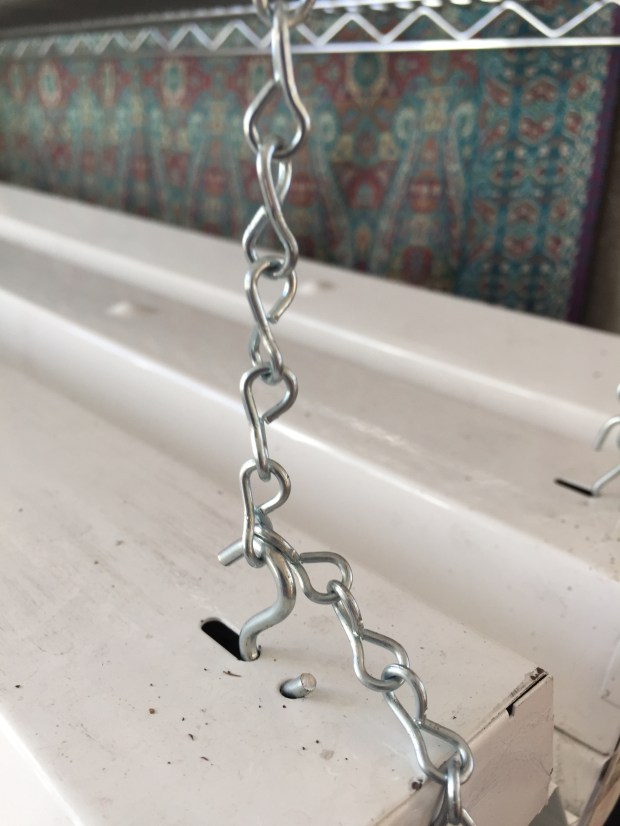
Close up of how the chain connects to the shop light. I would highly recommend using pliers to close the hook so that it doesn’t come loose when you are adjusting the lights. If you don’t, your plants may learn words they are not supposed to hear.

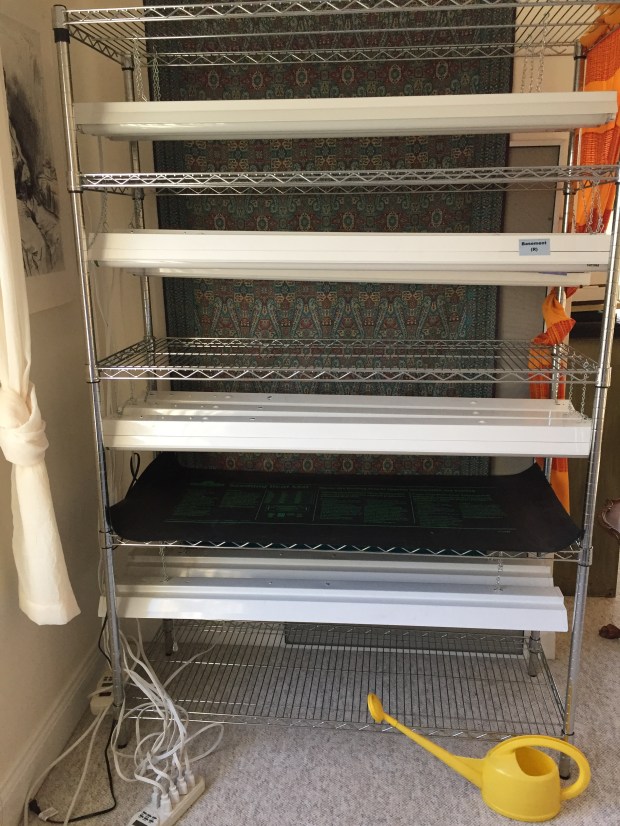
Side view of 3 adjacent lights hooked up to shelf. Heat mat is below. The orange curtain on the side is purely decorative.The finished product: (This is the one already in existence).
Here is the plant stand I used last year, it is all ready for 2017!
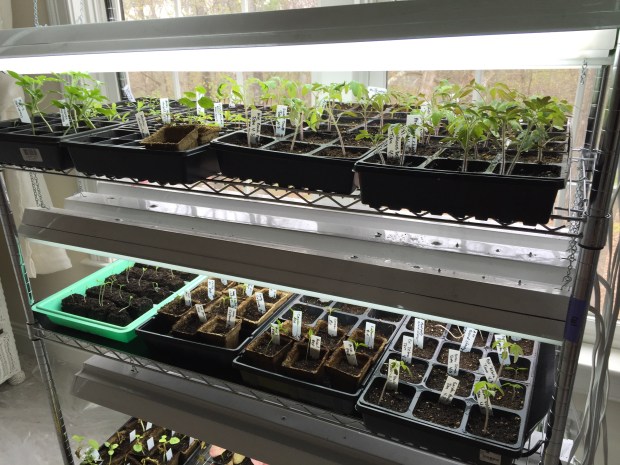
Here is a picture from last Spring–look at all the happy plants. Just like Bob Ross’s happy trees.
There are other ways to do this that cost way less, too, especially if you are growing fewer seedlings. You really just need some lights with full-spectrum lightbulbs and a bit of heat. At the NOFA conference that I attended in January, one farmer who has a seedling business said that she uses electric blankets to heat the soil to make eggplants, peppers, tomatoes and other heat-loving plants germinate. Once most of these plants germinate, then they can grow in much cooler temperatures.
Part 2 of 3: Planning and Planting…Starting Seeds Successfully Inside.
Interested in what not do in this process? See Starting Seeds Inside: 5 things NOT to do.


One thought on “Part 1 of 3. Build your own Grow Station to Start Seedlings Inside….Successfully!”