
I am finally writing the third part of the series, a bit later than promised, but here it is. I have planted over 5000 seeds in the past 6 weeks and I now dream of plants the way I used to dream about teaching, but I wake up happier. Yay! Here are some helpful hints to keep YOUR plants happy and healthy; though I do not think they will be doing too much dreaming.
1. Provide the “right” temperature for your plants: Different plants have different temperature requirements -make sure to read the instructions on the packet and heat/cool your plants appropriately.
- Give your heat-loving plants the right amount of heat until they germinate. This includes eggplants, peppers, tomatoes, etc. You can use the heat mats that are sold through gardening catalogs, nurseries or online. Want an alternative? I have also heard of growers using electric blankets on their shelves, tiny incandescent Christmas lights, or the top of refrigerators as heat sources, although I have not tried them myself. I am guilty of purchasing the seedling-starting heat mats and have used them for years and years. They can wet and dirty, are easy to clean and are smooth for sliding trays in and out of the shelves.
- Consider using a cooler area of the house for germinating plants that require lower temperatures. I am currently using an unheated basement for this purpose. Some plants that fall into this cold category include rosemary, spinach and lettuce. Many plants can also be moved to an area with a colder ambient temperature once they have germinated in a warmer location.
2. Water regularly, but let seedlings drain. This is the hardest part- watering enough, but not too much!
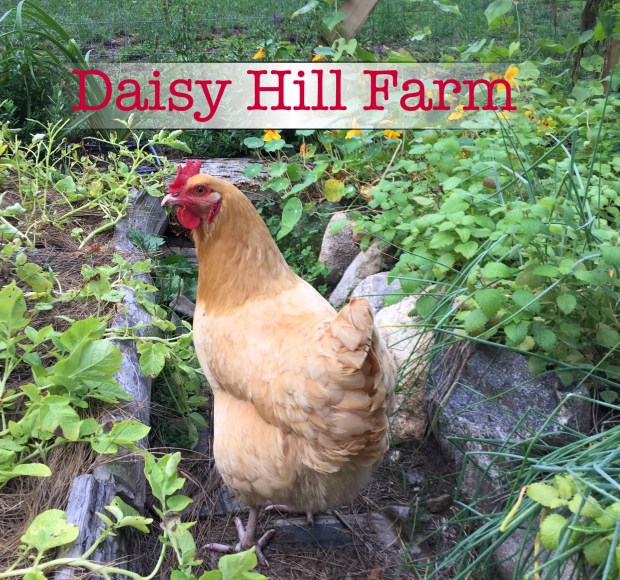 Daisy is the head chicken here at Daisy Hill Farm (she really lobbied hard to get us to name the farm after her). Daisy has been helping a ton with watering and caring for the seedlings, and the learning curve has been steep for her. Unfortunately, she has accidentally over-watered and under-watered some plants. Seedlings are very, very sensitive (like me on a sleep-deprived day watching an episode of This is Us). The difference, of course, is that after a rough I day I recover. Sadly, sensitive baby plants will not and could either die or be permanently stunted.
- If you see cracks in your soil, it is likely not getting enough water, like the lemongrass seedlings below on the left. After the crack viewing, there was some panicking, and TOO MUCH WATER was applied to the situation. See photo below right. Lakes in take-out containers like this one also signal bad watering techniques. And, of course, all of this was done by my head assistant chicken, Daisy. She really needs to work on her technique.
 Underwatered- notice crack in soil. Beware of cracks. A crack means WATER ME NOW!!!
 Overwatered. Notice the lake. Lakes mean: TOO MUCH WATER!!! FLOOD WARNING!
Daisy did some research and also watched me perform my twice-thrice daily seedling duties and suggests the following tips for seedlings and water. Good work, Daisy.
- Use a spray bottle instead of a watering can to keep the soil a bit damp until seeds germinate. The medium that the seedlings are in should be damp until germination, but not soaking wet. I continue to use the spray bottle to water very small plants, like lavender, marjoram and thyme.

It was interesting trying to hold the phone still enough for a shot of my other hand spraying the lettuce seedlings with the spray bottle.. Interesting is, of course, an interesting word…
- Use a small watering can with controlled output to water when seedlings get large enough (1/2″ -1″or so). This is my favorite watering can below-super small holes, 2 liter Dramm watering can from Sweden.

- Let the plants dry out a bit between watering sessions when they have a couple of sets of true leaves.
- What is a “true” leaf, you ask? Well, the first leaves that you see on your seedling are called cotyledons, and they are not considered “true” leaves, they often have a totally different shape than the rest of the leaves on the plant. The next set of leaves that grows after the first fake leaves (aka cotyledons) are “true”. Words are funny. Obviously the first leaves are real, and yet somehow they are not “true”. See illustration image below for more help understanding this complicated issue, and always remember to fact check your sources.

- What is a “true” leaf, you ask? Well, the first leaves that you see on your seedling are called cotyledons, and they are not considered “true” leaves, they often have a totally different shape than the rest of the leaves on the plant. The next set of leaves that grows after the first fake leaves (aka cotyledons) are “true”. Words are funny. Obviously the first leaves are real, and yet somehow they are not “true”. See illustration image below for more help understanding this complicated issue, and always remember to fact check your sources.
3. Provide Air Circlulation.
- Plug in a small fan near seedlings. This will help to prevent the dreaded damping off. There is no need to make a paper fan and fan your plants for hours a day. That is too much work. When I found Daisy doing that last Thursday I decided to give her Friday off, she really needed a three day weekend to relax. We talked a bit about mindfulness, and she is also working on that- so thanks to the many readers for that suggestion!
4. Thin the plants to one plant per cell.
- In case you aren’t sure what thinning is- it means to choose one plant to live and the others to die. Because you kill them. By yanking them cruelly out of their happy little homes.
- This is very hard to do because you just tried so hard to get these plants to grow and now you are going to select the weakest for death! Don’t worry, though, plants don’t have nervous systems, which means they don’t have feelings, which means they can’t feel pain, which means you don’t have to feel guilty. I promise.
- When a plant has more

Too many plants in one cell! yank out all but your favorite with some mighty fine tweezers.
space around it, it will grow a larger root system faster and became a much healthier plant than if it was competing for space with another little friend.
5. Fertilize seedlings with 1/4 strength liquid fertilizer once the plants have 4 “true” leaves.
- Recommendations for this are 1x a week until transplanting outside. This is something that I have neglected to do in the past and am adding to the regime this year. I am going to use Neptune’s Harvest fertilizer. That stuff is awesome.

- However, I do not recommend storing the concentrated bottle of fertilizer in an area where your toddler might knock it over during a massive tantrum. This could lead to this very rich, stinky stuff soaking into a carpet in the mud room, forcing you to not only remove the carpet, but also the subflooring because that shit smells nasty when it soaks into your house. If you think Neptune’s fertilizer is expensive, try replacing a floor. I mean, hypothetically. This definitely did not happen to me. Just ask my husband.
6. Get the seedlings ready for outside! This is called hardening off.
- Because you have been caring for your plants so carefully and lovingly inside, you must help them adjust to the harsh reality of growing outdoors where they will not get to listen to the latest podcast while you care for them, they will not receive daily affirmations about just how darned smart and funny they are. How do you do this, you wonder? Well, you need to **slowly** move them outside.
- Ideally, you would set them outside in an area protected from the wind and direct sunlight for the first 2-3 days. I like to place mine on the porch next to the house for a windbreak on a fairly cloudy, mild day for 2-3 hours the first day, 4-5 the second and third days.

Seedlings hardening off on the porch in Spring 2016
- After a couple of days in sheltered shade and/or dappled sunlight, your special plants can then be moved to sunlit areas for a few hours of the time, and depending on day and night temperatures, can begin to stay outside in a sheltered area for the night. Like summer camp before you leave for college. Like that.
7. Want to avoid all of this? Get a cold frame!
- More on the magic of cold frames later. For now, I will give you this small tidbit of information. Like a tiny, tiny cookie.
- A coldframe is a small unheated greenhouse. I like to use them for everything from overwintering plants to starting seeds outside early to hardening off plants. In fact, I hardened off some spinach and lettuce last week in this little “greenhouse” I found at a yardsale last summer (pictured below). Using some type of protection from the wind and big swings in temperature for the first few days really helps the plants adjust well.


Daisy and I wish you some happy growing!

